12 Easy Tips to Improve Your PCB Desoldering Today
By Grant Price, Product Manager, Chemtronics
The reality is that no soldering operation produces perfect assemblies every time. Even the highest quality components fail from time-to-time. That’s why desoldering is so important for those who manufacture, maintain or repair printed circuit boards (PCBs).
The challenge is removing excess solder quickly without damaging the circuit board. That’s why, in this post, we’ll present to you our desoldering best practices, how to use desoldering braid, and top tips that we have encountered during our long history in the electronics industry.
These tips mainly focus on removing components with the help of desoldering braid (also known as desoldering wire or wick) and its advantages. It’s portable, easy to use, one of the most common tools used for PCB repair, and doesn’t require constant maintenance like other tools.
1. Keep Your Soldering Iron Tip Clean and Tinned For Effective Heat Conduction
This might seem like a no-brainer, but it’s often overlooked and is critical for efficient desoldering. Soldering iron tips covered with burnt flux and oxidation will not wet (accept solder) and will conduct heat poorly. A clean and tinned soldering tip conducts heat through the desoldering braid better and starts the wicking action faster.
- Before starting, tin the soldering tip by adding fresh wire solder to it.
- If the soldering iron tip isn’t responding to the extra solder, revive dirty tips by using a tip cleaner, often referred to as “tip tinner”. Plato brand Tip Tinner (part #TT-95) is a halide-free, solid paste which provides quick and safe re-tinning and cleaning of oxidized tips. Roll the hot tip in the compound until the bright tinning surrounds the end of the tip.
- Clean any residual compound from the tip by applying wire solder and then wiping it on a damp cellulose sponge or brass wire tip cleaner.
- Finally, apply solder to the tip again to protect it from oxidation.
- Whenever your soldering iron has sat for any length of time or after you are finished soldering “tin” the soldering tip with fresh solder to prevent oxidation.
2. Minimize the Length of Time That the Board and Components Remain at a High Temperature
Applying high heat levels to the board or its components for an extended period of time can damage your board or components, create brittle solder joints, and lead to service issues down the round.
- Keep your soldering iron set at a reasonable temperature. I know it’s tempting to turn your iron all the way up to increase your efficiency, but you could be shocking components or causing additional issues. Even with lead-free solders, anything over 700ºF (371ºC) is risking thermally stressing components. If you find it necessary to keep turning the temperature up throughout the day, refer back to tip #1.
- In a case when there are several components to be replaced on a single assembly or the components are particularly heat sensitive, you can use a PCB preheater. Preheaters allow you to ramp up the board temperature and maintain that temperature while you do your work. Although preheat temperature will be well under the solder melting point, thermal shock to components is minimized because you aren’t spiking quickly from ambient temperature.
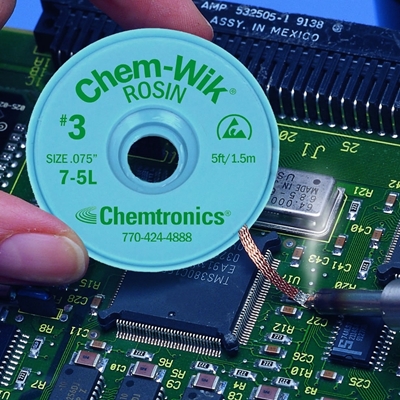
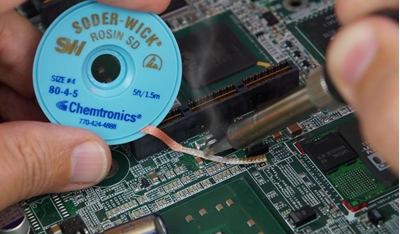
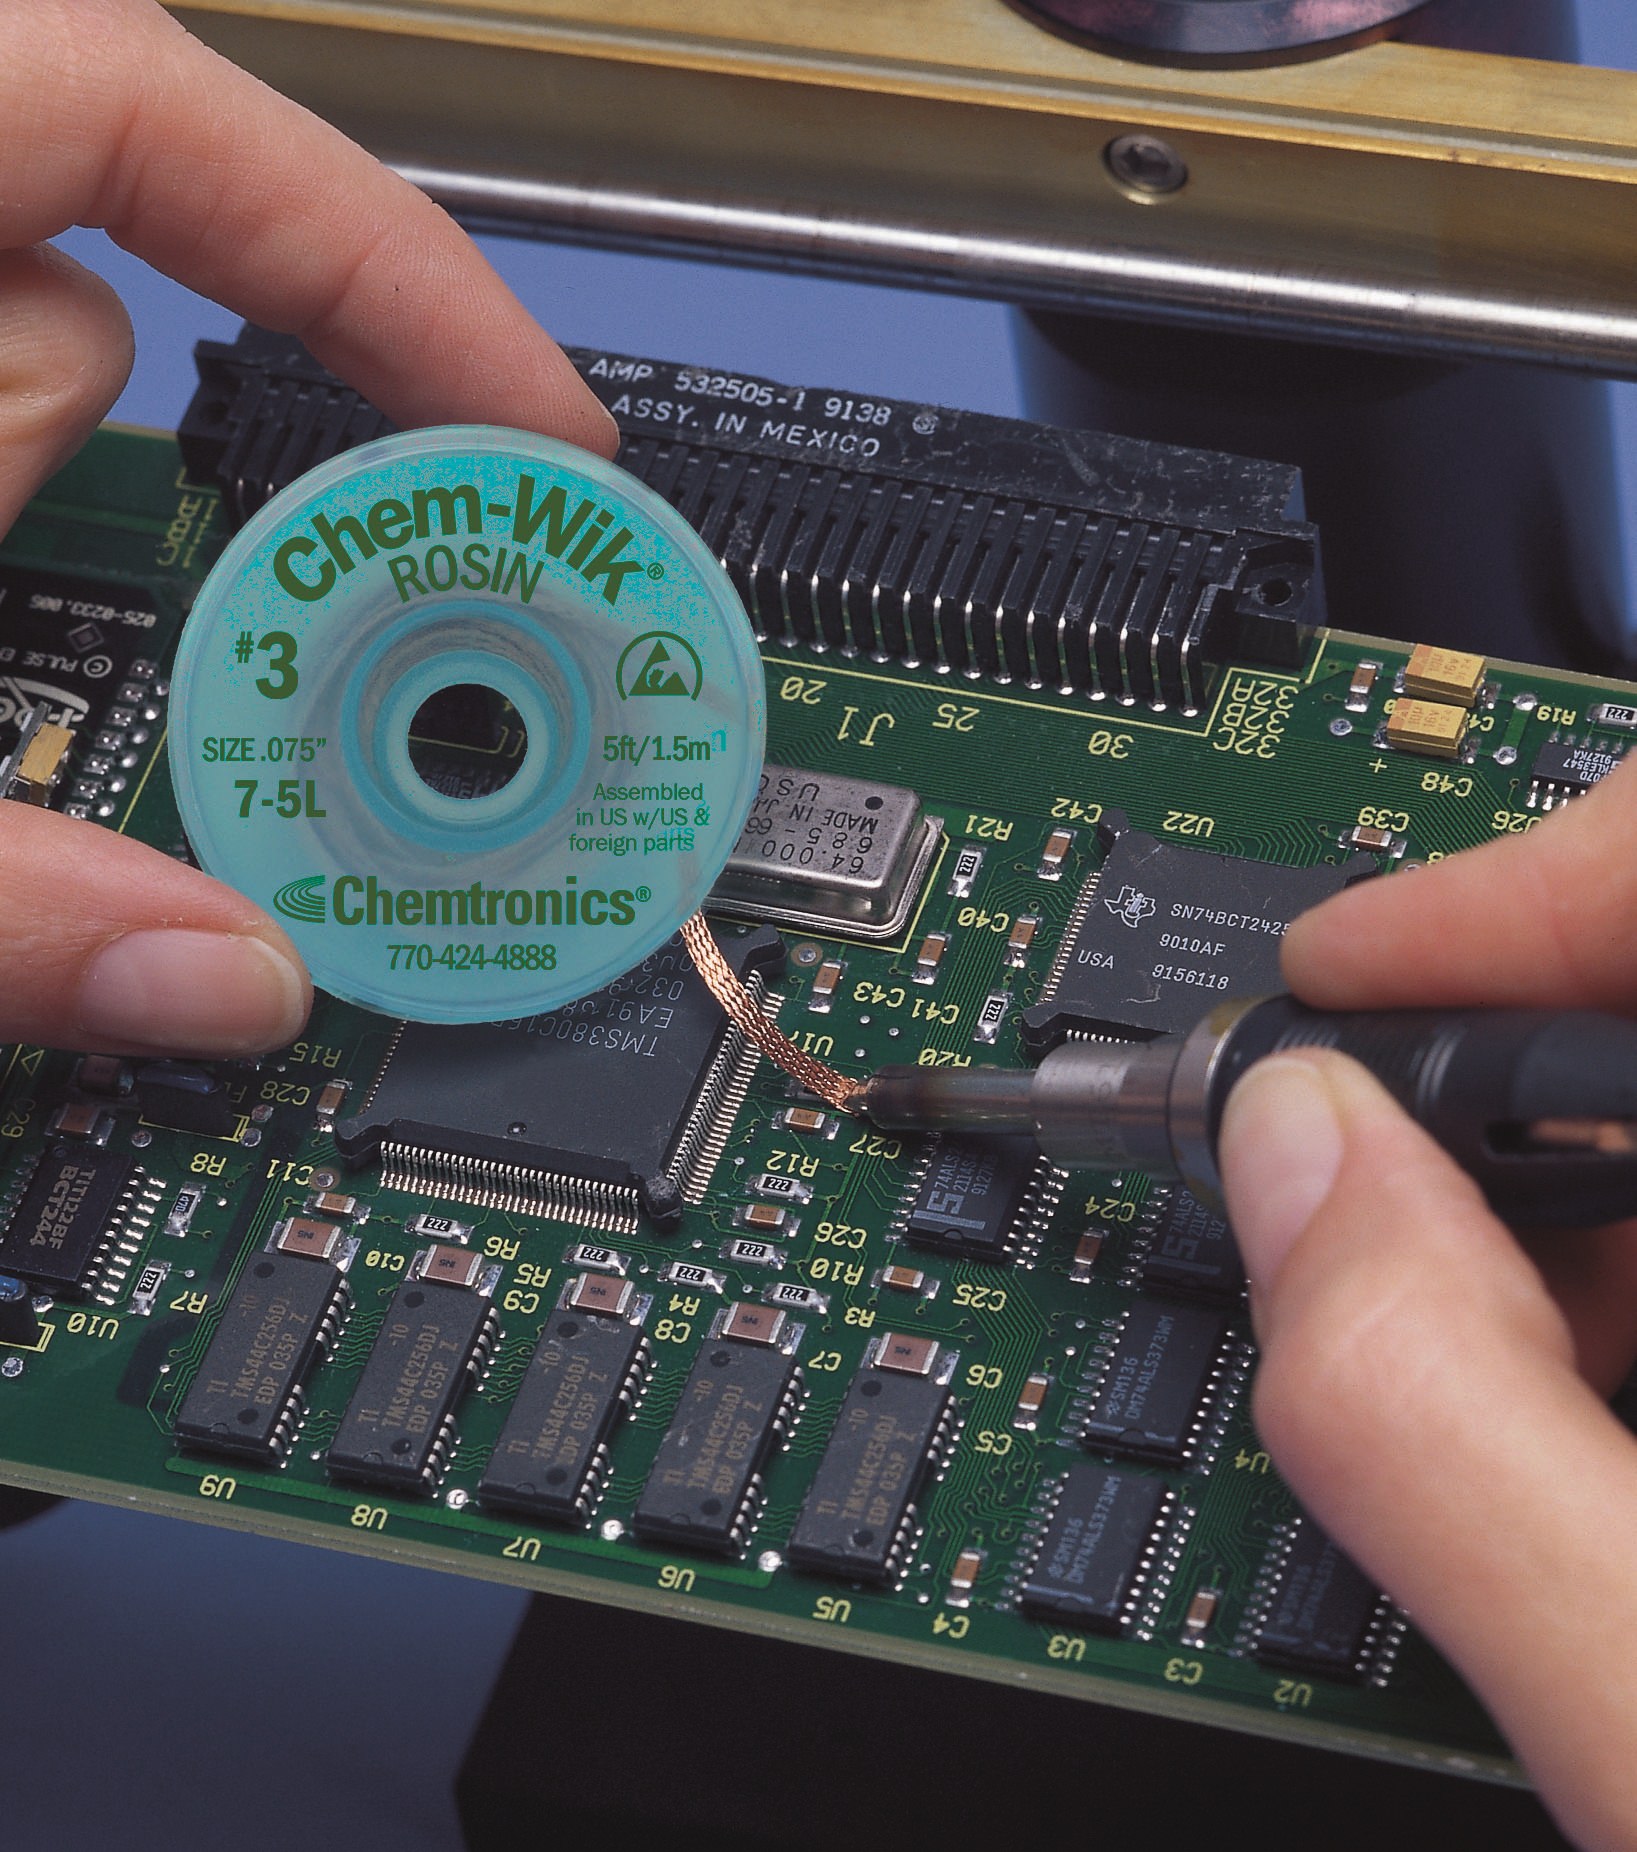
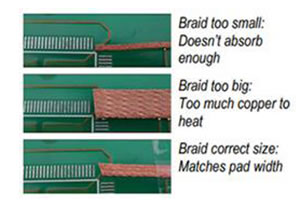
3. Match Solder Wick Width to Solder Joint or Contact Pad
Desoldering wick generally comes in several different widths so you can match the braid to what you are desoldering. Wick that is too thin won't remove enough solder and requires you to trim and remelt the solder over and over. Wick that is too wide takes longer to heat and may interfere with other components on the circuit board.
Choose a solder wick width that closely matches the size of the contact area. This will ensure that you get proper heat conduction and that you don’t desolder unwanted areas. Widths of desoldering wire are designated by the numbers 1 through 6 and\or color coded, which are the standard in the industry.
- #1/white braid is the smallest (under 1mm wide) and is mainly for SMD’s and microcircuits.
- Most will find #2/yellow, #3/green, and #4/blue to be the most common desolder wire.
- #5/brown is ideal for removing large blobs of solder and #6/red is best for desoldering BGA pads or terminals.
- Keep three or four different widths at your work area to cover all scenarios.
- Wick can be folded or trimmed at an angle to better fit the contact area.
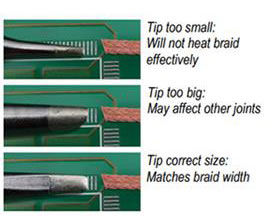
4. Match Soldering Iron Tip to Braid Width for Accuracy
Use a soldering tip that is roughly the width of the braid and contact area. A tip that is too small will require more dwell time. A tip that is too large runs the risk of exposing other components in a dense assembly. Matching the tip allows you to melt the unwanted solder faster and minimizes the time that heat is applied. Use a blade or knife tip when desoldering large areas, like a BGA pad.
5. Caution: When Drag Desoldering, Move Tip Over Braid, Not the Braid Across the Pads
Dragging the copper braid over pads, for example when desoldering BGA pads, can scratch OSP coating and even the pads themselves if enough pressure is applied. It’s best to apply the braid, and then drag the soldering tip over the braid.
6. Clip Used Desoldering Wick after Every Use
The temptation is to desolder an area and keep moving up the spool of braid. However, it’s best to work towards the end of the braid to isolate the heat. Once the desoldering wick is brought up to soldering temperature, the flux has been fully activated, so that part will not draw more solder. A long strand of used braid only acts as a heat sink, slowing down your process.
7. Avoid the #1 Rookie Mistake: Lift Up Iron and Braid at The Same Time
This is by far the most common error committed by inexperienced operators. After removing solder, make sure to lift up the iron and braid at the same time. Otherwise, you will solder the braid to the contact and risk lifting the pad.
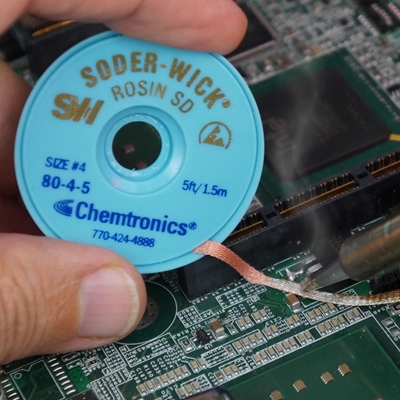
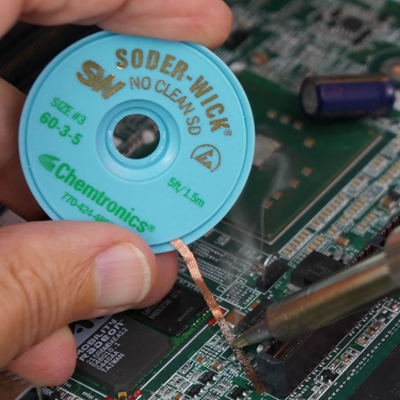
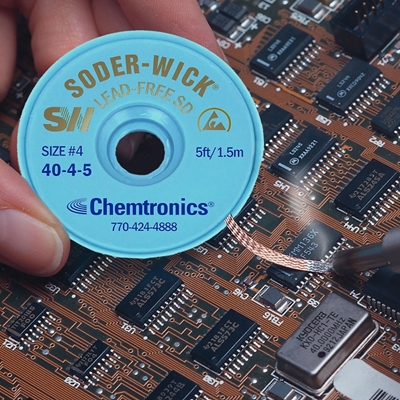
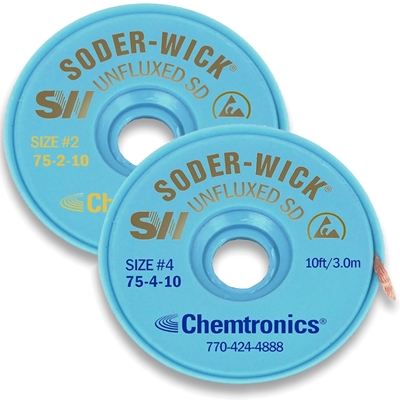
8. Match Flux Type to Your Cleaning Process
Desoldering braid is available in various flux types depending on your cleaning process and other requirements.
- Rosin – Rosin fluxed braid has the fastest wicking action but does leave behind residues that need to be thoroughly cleaned.
- No-Clean – No-clean fluxed braid is ideal when cleaning isn’t practical or possible. After desoldering, the only thing that remains is a clear, non-ionic residue. For field work, when a thorough cleaning is more challenging, this is the type of braid to use.
- Unfluxed – In a production or repair environment where the flux is specified and can’t be changed, or when an aqueous flux is needed, you can add your own flux to this type of braid. Unfluxed wick will not remove solder unless flux is added. Different types of fluxes are available in pen packaging, which is ideal for fluxing braid.
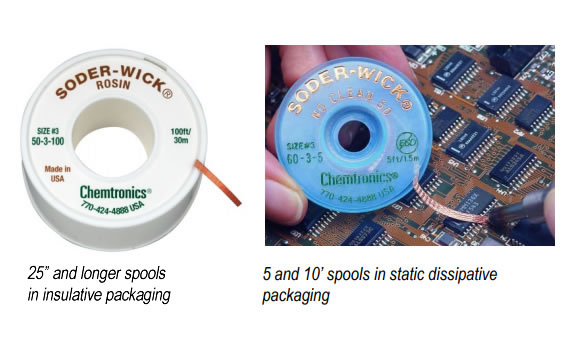
9. Choose Static Dissipative Packaging For Static Sensitive Applications
When working around static sensitive assemblies, make sure that the spool of desoldering braid is static dissipative (or ESD-safe). We have seen cases where an operator had a top-dollar ESD-safe workstation, mat, and grounding straps, but was caught with an insulative bobbin. Most dissipative wick packaging can be identified by their blue color. Even if a spool is black, don’t assume it is S20.20 compliant.
10. Adding Solder to Tight Areas Actually Makes It Easier to Remove
Small amounts of solder in tight crevices can be difficult to remove, but larger uniform solder joints wick right up. As counter-intuitive as it sounds, it helps to add more solder to joints like this before wicking up the unwanted solder.
11. Protect Your Board Against Corrosion By Using a Quality Flux Remover
Flux residues can cause dendritic growth and corrosion on PCB assemblies, so make sure you’re using best practices and clean the board. After the components have been replaced and excess solder removed, complete the following:
- Clean the area thoroughly with a quality flux remover
- Angle the board to allow the cleaner and residues to run off
- If needed, use a horsehair brush or lint-free wipe to gently scrub the PCB
- Follow with a rinse.
- If using a wipe, make sure it doesn’t leave fibers/lint on your PCB, which may cause issues later.
This is an optional step for no-clean braid, but still a good idea for densely populated or high voltage boards. It is absolutely required, regardless of the flux type, if you plan to follow your repair with conformal coating.
12. Follow Our Recommended Desoldering Process for Best Results
Lastly, we would like to end this post with how to use desoldering wick.
- Place the braid over unwanted solder, preferably on the greatest solder build up so that it maximizes the contact of the braid to the surface area of the solder.
- Next, place your iron tip over the wick at 45 degrees and allow heat to transfer to the pad. Molten solder will absorb into the braid.
- Move the solder tip and braid as needed to remove all of the solder at one time. Careful not to drag the braid over the pads, which can scratch.
- Once the braid is full of solder, you must trim the spent portion and move to fresh braid in order to pull more solder. Remove the iron and braid simultaneously to avoid soldering the wire to the board.
So there you have it. With these tips, you’re using industry-tested best practices for efficient solder removal. And now we would like to hear from you. What did you think of our list? Did we miss an important tip? Be sure to post your questions and comments below. If you need help selecting the best desoldering braid for your application, just contact us.
Ask A Technical Question
Stay up-to-date on Chemtronics news, products, videos & more.
Related Products