CircuitWorks Conductive Pen
Request a Sample

Your Sample Request

CircuitWorks Conductive Pens

*=required field

CircuitWorks Conductive Pens

Draw highly conductive traces, jumpers and shielding

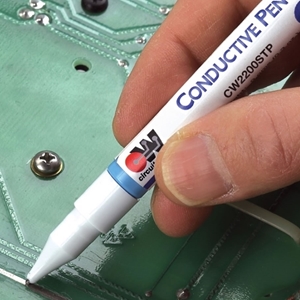
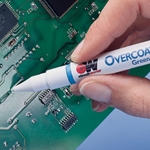
CircuitWorks® Conductive Pens make instant highly conductive silver traces on circuit boards and are used in prototype, rework, and repair of circuit boards by linking components, repairing defective traces, making smooth jumpers. The silver traces of the circuit pen dry in minutes and have excellent adhesion to most electronic materials. Engineers, repair technicians, and manufacturers will find that the CircuitWorks® Conductive Circuit Pen speeds project completion and cuts rework time.

CircuitWorks Conductive Pens are available in 3 types of inks:

  • Silver Conductive Pen (CW2200STP, CW2200MTP) - Highly conductive and the most popular option. Available with either the standard tip (CW2200STP) or micro tip (CW2200MTP).
    Conductivity - 0.02-0.05 ohms/sq/mil
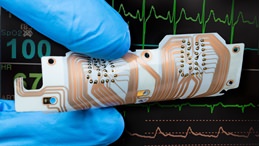
  • Silver Flex Conductive Pen (CW2900) - Also silver-based, and engineered for flexible PCBs. Only available with the standard tip.
    Condictivity - 0.05-0.15 ohms/sq/mil
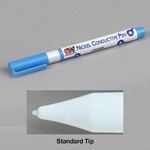
  • Nickel Conductive Pen (CW2000) - Lower cost nickel-based ink. Only available with the standard tip.
    Conductivity - 1.0 – 1.5 ohms/sq/mil

Features & Benefits

  • Quickly creates conductive silver traces
  • Valve pen tip for easy applications
  • Solderable at low temperatures
  • Superior electrical conductivity
  • Dries in minutes at room temperature
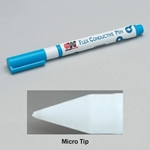
  • Choice of Micro Tip (MTP) for fine lines or Standard Tip (STP) for wider lines

Applications

  • Repairs traces
  • Links components
  • Makes smooth jumpers
  • Shields electronics

Swipe to View Add to Cart Button 

Part # Size Units Per Case
CW2200MTP

Silver Conductive Pen - Mirco Tip, 8.5 g (0.3 oz.) pen

12 pens
CW2200STP

Silver Conductive Pen - Stnd Tip, 8.5 g (0.3 oz.) pen

12 pens
CW2900

Flex Conductive Pen - 8.5 g (0.3 oz.) pen

12 pens
CW2000

Nickel Conductive Pen - 9 g (0.32 oz) pen

12 pens
Order from an authorized distributor

FAQ's

How do I use a conductive pen?

Here's a step-by-step guide on how to use a conductive pen:

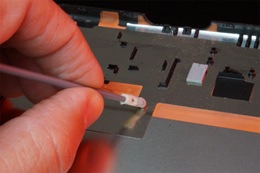
  1. Expose conductive surface of repair area: When repairing a trace, conductive ink needs to have good contact with the beginning and end of the gap. This often involves scraping way resist to expose the conductive surface.
  2. Prepare the surface: Clean and free from any debris, dust, or old solder. You can use isopropyl alcohol and cotton swabs to clean the area properly.
  3. Shake the pen: Before using the conductive pen, shake it vigorously until you hear the click of the internal bearing, which provides agitation within the pen. If the ink is dark and not a silver color, continue to shake the pen to fully mix the ink.
  4. Prime the pen: When using the conductive pen for the first time or after a long period of non-use, you may need to prime the pen to get the ink flowing smoothly. Press the tip of the pen against a scrap surface (e.g., paper or a non-conductive material) until the ink starts flowing. You may need to clear the tip of dried ink with a wipe saturated with solvent like isopropyl alcohol (IPA).
  5. Draw the conductive trace: Hold the conductive pen like a regular pen or marker, and apply gentle pressure to the surface while squeezing the barrel. Be precise and steady in your movements to get a clean line. You can draw lines, bridges, or connect components, just like you would with a pen or a pencil.
  6. Cure the ink: Let the ink air dry for at least 1 hour.
  7. Test the conductivity: Once the ink is cured, use a multimeter or continuity tester to test for continuity between the endpoints of the trace to ensure the connection is complete.
  8. Clean the pen tip: After use, make sure to wipe the tip of the pen clean with a wipe. This prevents the tip from getting clogged and ensures better performance in the future.


Click here for an illustrated guide to using a conductive pen for PCB repair.

What does conductive pen do?

Conductive ink pens are specialized writing tools designed to draw circuits and create electrical connections on various surfaces. The ink used in these pens contains conductive materials (e.g. silver), which allow it to conduct electricity.

Here's what a conductive pen can do:

  • Circuit Prototyping: Conductive pens are often used for rapid prototyping of electronic circuits. Instead of traditional methods like soldering, engineers can draw circuit traces directly onto a PCB using the conductive pen.
  • Repairs: These pens are useful for repairing damaged or broken circuit traces on electronic devices or printed circuit boards (PCBs). By drawing a new conductive trace with the pen, one can restore the electrical connection without requiring complex rework.
  • Low-voltage Electronics: Conductive pens are suitable for low-voltage applications, such as wearable electronics, simple sensors, touch-sensitive interfaces, and other electronic projects that don't involve high power or high-frequency signals.

How do I unclog the tip of the pen?

You should be able to unclog by 1) removing the cap, 2) let it sit tip-down in a solvent like isopropyl alcohol, 3) press down (without squeezing the barrel) a few times in the process to break the stopper loose, 4) let sit 5-10 minutes, 5) then when you take it out, squeeze the barrel and try to write.

Can I solder directly onto a drawn trace?

A trace drawn with the conductive ink will combine with solder, provided the soldering temperature does not exceed 350°F (177°C) and the solder joint is formed within 5 seconds. If the drawn trace must be soldered to, we recommended that tin/lead solder containing 2% silver be used and that the trace is heat-cured at 150°F (66°C) for five minutes to produce the most durable trace possible.

How do I prepare the surface for trace repair?

For optimal adhesion to most surfaces, clean the repair area prior to ink application. That insures the surface is free of oil, greases and handling soils. For precise cleaning just around the rework area, Chemtronics offers CircuitWorks Flux Remover Pens, which contain fast evaporating cleaning solvents. Chempad (#CP400) isopropyl alcohol (IPA) presaturated wipes and Chemswab (#CP25) IPA presaturated swabs are also well suited for surface prep.

How do I unclog a conductive pen?

If you experience difficulty in producing a smooth flow of conductive ink, this could indicate clogging of the product outflow channel within the tip assembly. As the pen sits in storage, especially if stored tip downward, the suspended silver particles will slowly settle and can clog the channel through which the product flows. To restore the pen to proper operation, it must be shaken vigorously, usually for two to three minutes. Shake the pen until you can hear the internal mixing bearing “clicking” or moving within the pen barrel. Once you have established movement of the mixing bearing, continue to shake the pen for another minute or so to completely re-suspend the silver particles within the polymer matrix, which will produce a smooth, homogenous product. If shaking the pen does not free the mixing bearing (you cannot hear it moving within the pen barrel) or the ink still refuses to flow when the pen tip is retracted, then the clogging within the tip assembly is more serious and will require a more rigorous cleaning to re-establish proper operation. Remove the cap and with the pen tip pointing up, grip the white base of the tip assembly gently but firmly and turn it to the right (clockwise-because the tip assembly is “reverse-threaded”). Remove the tip assembly and drop in into a small container of Flux-Off Heavy Duty or another suitable solvent.  Let the tip soak for 30 minutes to one hour, with occasional shaking or swirling, to clear the internal spaces within the tip assembly. As dried polymer dissolves you may see a fine dust of silver collect on the bottom of the soaking container. While the tip is soaking you may want to cover the opening in the pen barrel with a piece of tape to minimize exposure of the conductive ink to air and moisture. Once the tip has been cleared of ink, remove it from the solvent and let it drain on a paper towel and stand in the air for 10 minutes to allow the cleaning solvent to evaporate. Check that the tip stopper moves freely and retracts into the assembly easily, then screw the tip assembly back onto the pen barrel. The pen should now perform properly. If not, repeat the soaking procedure until the tip has been cleared. If soaking the tip assembly does not get the pen flowing, then the pen is probably past its usable shelf-life and should be replaced. 

How do you repair a broken trace on a PCB?

A common method of repairing a broken trace is to solder on a jumper, which is basically a wire bypass around the broken trace. This can be time-consuming and visually unappealing. Chemtronics offers CircuitWorks® Conductive Pens, which contain a highly conductive material like silver or nickel suspended in a liquid polymer. These pens allow you to literally redraw the trace.

How do I figure out the shelf life of a product?

The shelf life of a product can be found on either the technical data sheet (TDS), available on the product page, or by looking on the certificate on conformance (COC). The COC can be downloaded by going to https://www.chemtronics.com/coc. Once you have the shelf life, you will need to add it to the manufacture date for a use-by date. The manufacture date can be identified by the batch number. The batch code used on most of our products are manufacture dates in the Julian Date format. The format is YYDDD, where YY = year, DDD = day. For example, 19200 translates to the 200th day of 2019, or July 19, 2019. This webpage explains and provides charts to help interpret our batch numbers: https://www.chemtronics.com/batch-codes.

Articles

Flexible Electronics Soldering Challenges: CircuitWorks Conductive Epoxy to The Rescue

Flexible Electronics Soldering Challenges: CircuitWorks Conductive Epoxy to The Rescue

This article discusses the potential of hybrid printed electronics (particularly as wearable gadgets) and provides some examples. We then compare various methods of mounting electronic components on flexible substrates and highlight Chemtronics’ products which aid electronics manufacturers to addres...
Read This Post
Drawing Conductive Traces: Fast & Effective Method of Repairing PCB Trace Defects

Drawing Conductive Traces: Fast & Effective Method of Repairing PCB Trace Defects

This article highlights methods to rework damaged PCB traces new developments in the field of PCB reworking, including the pros and cons of using conductive pens.
Read This Post
Top 12 Mistakes Made When Repairing Electronic Circuit Boards

Top 12 Mistakes Made When Repairing Electronic Circuit Boards

In this article, we will discuss the top 12 mistakes made when repairing electronic circuit boards, including how to avoid them and what to do if you've already made them. By following these tips, you can save time, money, and frustration when working with electronic circuit boards.
Read This Post
HOW-TO: PCB Trace Repair With Conductive Ink

HOW-TO: PCB Trace Repair With Conductive Ink

A common method of repairing a broken trace is to solder on a jumper, which is basically a wire bypass around the broken trace. This can be time-consuming and visually unappealing. Chemtronics offers CircuitWorks Conductive Pens which contain a highly conductive material like silver or nickel suspen...
Read This Post
Solderless Repair of Defogger Grids

Solderless Repair of Defogger Grids

Rear windshield defogger repairs usually involve two basic types of failures: a.) Repairing broken grid wire traces and/or b.) Re-soldering the power connection tabs. Re-soldering these connections in a repair center or work shop is virtually impossible, as access to the broken grid or connection t...
Read This Post
Conductive Pen Tips and Tricks for Best Performance

Conductive Pen Tips and Tricks for Best Performance

CircuitWorks Conductive Pens have a wide range of uses, from drawing traces between components on prototype circuit boards, coating components and assemblies to shield them from electrical and radio frequency interference, to repairing broken solder traces on PCBs and broken grid lines on automobile...
Read This Post
Ultimate Guide to Benchtop PCB Rework & Repair

Ultimate Guide to Benchtop PCB Rework & Repair

The reality is that no soldering operation produces perfect assemblies every time. Even the highest quality components fail from time-to-time. That’s why understanding the best rework and repair methods and materials is so important for those who manufacture, maintain, or repair printed circuit boar...
Read This Post
Using CircuitWorks® Conductive Paint to Maximize High Frequency EMI/RF Shielding

Using CircuitWorks® Conductive Paint to Maximize High Frequency EMI/RF Shielding

Though EMI and RFI are often used interchangeably, Radio-Frequency (RF) refers to a specific subsection of the Electromagnetic (EM) spectrum, namely the frequency range dedicated to radio frequency transmission. As can be seen on the EM spectrum diagram, RF frequency starts from as low as 3 kHz to a...
Read This Post
Related Products
You did not finish submitting your information to request a sample