Guide to Medical Imaging Maintenance
Medical imaging is one of the most common diagnostic processes. This involves computed tomography (CT) scanning, x-ray, and ultrasound. The most popular imaging device is the X-ray machine. X-ray equipment needs to be maintained regularly by the engineer or specialist. This article covers some basic procedures for maintaining these types of machines.
How Do Medical Imaging Devices Work?
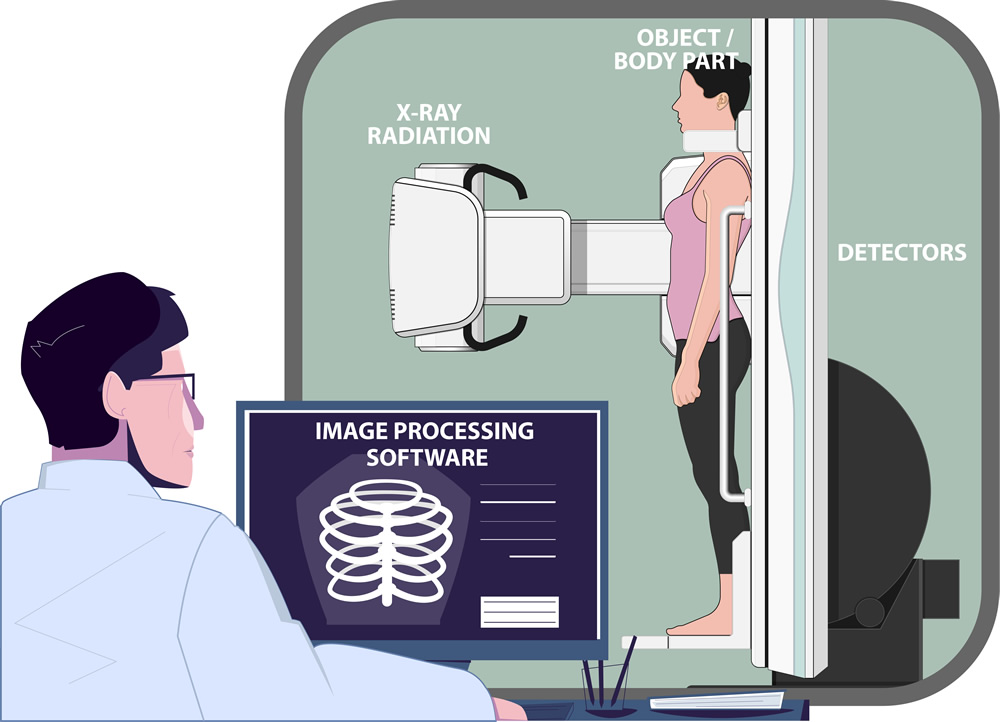
X-ray machines create radiation to be used in medical diagnostics. Through the help of detectors, emitted radiation is converted into medical images. X-ray machines can be classified depending on the image generated: digital or analog. X-ray machines can be also classified based on how they are used or installed: mobile, ceiling-mounted, or floor-mounted. While the X-ray generates the radiation, it is the detector that converts the signal. The detector is the receptor of the radiation emitted by the x-ray machine. Detectors evolved from ordinary film to digital flat panel detectors.
The basic step-by-step maintenance procedure applies to all types of medical imaging devices.
Three (3) important things to do during medical imaging devices maintenance are an over-all functionality check, exterior & interior cleaning, and mechanical & electrical parameters checking.
X-ray Machine and Detector Functionality Check
Step 1: Prepare a measuring device, preferably a dose meter to check the radiation and parameters (kV, mA, mAs, and other parameters). Place the sensor at the center of the collimation one meter from the tube of the x-ray machine. Conduct several exposures with different settings and compare the reading to the setting. Check whether the output is within 10% of the target value. If not, then conduct the necessary calibration.
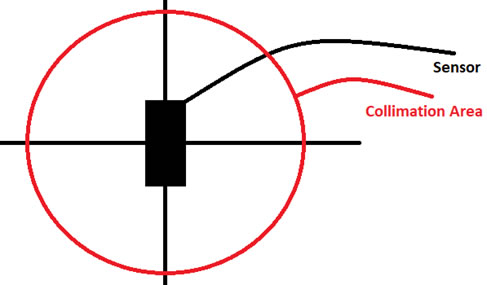
Fig. 1: Dose meter sensor positioning
Step 2: Next is the collimator alignment. Prepare coins and place it on the four corners of the detector. Open the collimator to the maximum collimation area and expose to check the result. Check the image to ensure all four coins are captured. Measure any misalignment to check whether it will still pass the standard. If not, conduct the necessary calibration.
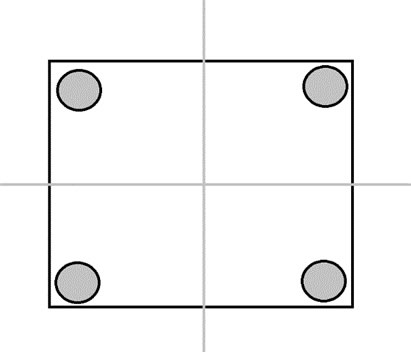
Fig. 2: Coin positioning for alignment checking.
Step 3: Check all the switches and moving parts if all still work properly. If not, repair or replace parts as needed. Magnetic contacts should be cleaned periodically to prevent moving parts from sticking.
Generator and Transformer Cleaning
Step 1: Aerosol duster and a precision solvent cleaner can be used to clean the circuit boards, switches, relays, circuit breakers, and electrical panels inside the generator. When selecting a solvent cleaner, make sure it is compatible with all of the components, especially rigid plastics and rubber gaskets. Shut off power at the main breaker for safety purposes. For more information on cleaning electronics, check out our Ultimate Guide to Cleaning Electronics.
Step 2: Use an aerosol electrical contact cleaner to clean the three-phase electrical connection inside the transformer. Like with the electronic cleaner, make sure it is compatible with all of the components, especially rigid plastics and rubber gaskets. Ensure that the power source is turned off before starting the cleaning process. If using a flammable contact cleaner, wait until the solvent has fully evaporated before powering up.
Step 3: Wipe off dust and dirt particles on the generator and transformer to maintain cleanliness.
X-ray Machine and Detector Cleaning
Step 1: Presaturated alcohol wipes or dry wipes with isopropyl alcohol can be used to clean the x-ray tube, collimator, console, x-ray bed, x-ray wall bucky and the X-ray body. Use alcohol wipes on the bed or the wall bucky after each use for sanitation.
Step 2: Use alcohol wipes to clean the surface of the detector.
Step 3: Disassemble the detector and access the image plate. Clean the image plate by wiping the whole surface with lint-free dry wipes.
Mechanical and Electrical Parameters Checking
Note: Check mechanical and electrical parts, the machines must be energized.
Step 1: Activate the moving parts one by one. Start with the bucky stand. Press the switch and if there is a clicking sound, it indicates that the solenoid is working. Try to move the bucky stand, if it is not moving smoothly apply degreaser on the moving part to clean it and check whether there is an improvement on the movement. (Repeat steps on the x-ray head, x-ray table and x-ray railings.)
Step 2: Refer to the service manual to check the electrical components. Follow the service manual to check the test points and evaluate whether all boards are working normally. If there is an abnormal reading, troubleshoot until confirmed working correctly.
Diagnostic medical devices are keys to prevention and early detection. Results must be reliable and accurate to avoid misleading diagnosis. Proper maintenance must be performed to ensure the desired accuracy and the reliability of results.
For more information on swabs, wipes, cleaning solvents, and other necessary supplies for medical device maintenance, contact a Chemtronics technical specialist at [email protected] or 678-928-6162.
Ask A Technical Question
Stay up-to-date on Chemtronics news, products, videos & more.