Ultimate Guide to Cleaning Electronics: Improve PCB Reliability Safely & Effectively
In the process of assembling, reworking, or repairing printed circuit boards (PCBs) for electronic devices, the discussion inevitably turns to whether or not to clean the PCB. Cleaning adds time and expense to the process, and doing it wrong can cause more harm than good. However, proper cleaning is often essential for performance and safety.
This guide will walk you through the reasons to clean PCBs and the best practices for electronics cleaning.
Why Clean a Printed Circuit Board (PCB)?
Since cleaning PCBs is not always required and adds time and cost to the production or repair process, some justification may be required.
- Improve Aesthetic Appearance: If you are a contract manufacturer of PCBs, the visual appearance of the board reflects on your work. A clear, greasy-looking residue around a solder joint may raise flags for your customer’s incoming QC inspectors. If the flux residue chars and forms spots on the solder joints, it may look like a true defect like a solder joint void or “blow hole”. If the flux residue is from a rework process, it acts as a fault tag in the rework area calling attention to the work even if there shouldn’t be a concern.
- Improve Reliability: Reliability requirements are generally driven by the nature of the final product. For a disposable product like a computer keyboard, an EMS supplier may use no-clean flux and forgo the cleaning process. On the other end of the scale, requirements for pacemaker electronics, where board failure could directly lead to death, are going to be much stricter. In that example, cleaning will be required after assembly and rework, and the process will be thoroughly tested. Long-life durable goods may fall somewhere in-between.
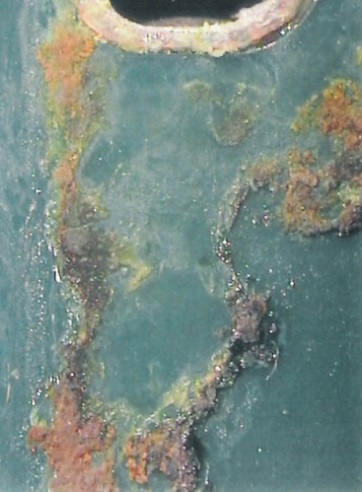
- Prevent Corrosion: Flux residues left on electronic circuit boards are acidic. If they aren’t removed with a cleaning process, the residues can draw in ambient moisture from the air and lead to corrosion of component leads and PCB contacts.
Corrosion on failed assembly in QFP area (photo courtesy of Foresite)
- Avoid Adhesion Problems with Conformal Coating: When there are flux residues left on the PCB before the coating process, it is common to see the coating lift or delaminate from the surface of the board. “No-clean” refers to the amount of ionic material left after soldering; it has nothing to do with whether or not coating can stick to it. Furthermore, coatings are semi-permeable and “breathe” to a certain extent, meaning moisture can enter and soak into the flux residue and potentially lead to corrosion.
Flux residues causing coating uplift (photo courtesy of NPL)
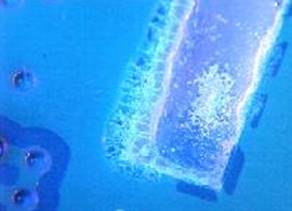
- Prevent Dendritic Growth: Polar or ionic particles left from flux residue and other sources, when exposed to moisture from the ambient air and when current is applied, can connect into a chain or branch called a dendrite. These dendrites are conductive so form an unintended trace that cause current leakage or, over a longer period of time, even a short circuit.
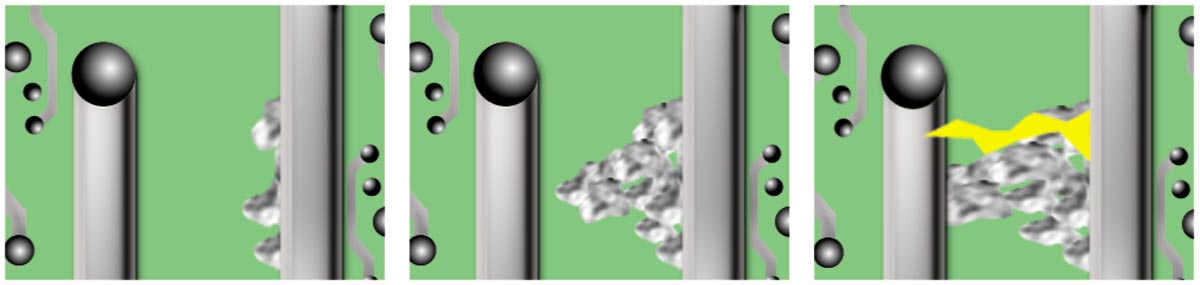
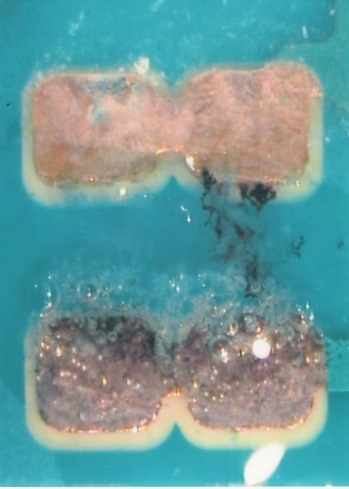
Dendritic growth between solder pads, caused by ionic contamination (photos courtesy of Foresite)
Understanding Contamination
When populating the board with components, the components themselves can carry various ionic/conductive contaminants to your assembly including cutting oils/fluids, oxides, and corrosion preventatives. Be aware of common nonionic materials that can also affect the assembly steps—process oils, mold releases, etc. can be detrimental down the line.
| Contamination Type | Definition & Characteristics | Examples |
|---|---|---|
| Ionic Contaminants | Ionic contaminants are remains of flux that are left behind during the assembly process. Ionic compounds are held together by electrostatic forces and the compound itself has a zero net charge. These materials will dissociate when exposed to water into positively charged cations and negatively charged anions. | Table salt (sodium chloride). |
| Polar Contaminants | Polar compounds can have a positive charge on one side of the molecule and a negative charge on the other side of the molecule; these molecules never split apart. | Water and Isopropanol (or IPA). |
Most Common Ionic Contaminants From Bare Board Fabrication
- Trapped Moisture: Water is a polar contaminant that is conductive for dissociating other ionic materials, which then lays the foundation for conductive mishaps. It is common practice to “bake” the boards to remove extraneous moisture.
Corrosion from PCB fabrication contamination (photo courtesy of Foresite)
- Etching Chemicals: Etching chemicals are highly conductive and can be corrosive as well. They must be chemically neutralized and removed/rinsed and are well-known as sources for current leakage.
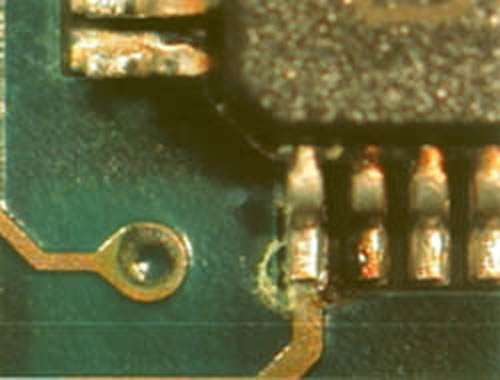
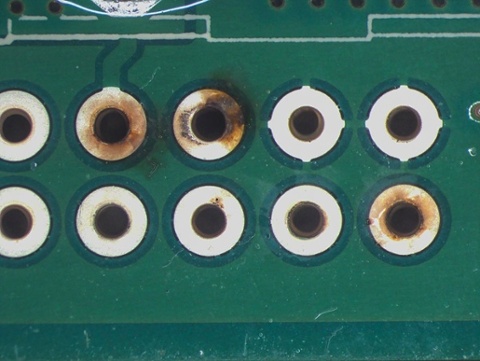
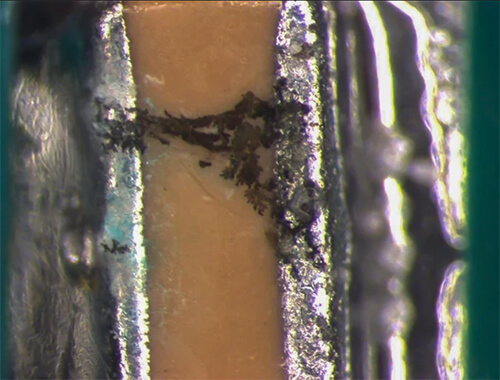
- Flux Residues from Soldering: Fluxes can leave residues that cause serious reliability defects. Common conductive flux residues can include unreacted activators, binders, rheology components, and saponifiers. Among these are acids (abietic, adipic, succinic), basic ingredients (amino compounds), and constituents found in “soaps” (phosphate and sulfate ions).
Heavy no-clean flux residue with visible copper corrosion (photo courtesy of Foresite)
- Inter-Layer Residues: Residues from drilling, via plating, and the cleaning process chemistry itself must also be removed. Saponifiers used in aqueous systems are highly polar and ionic and can enhance dendritic growth if not removed. Corrosion preventatives and surfactants must also be removed along with the soils.
Dendritic grown between solder pads, caused by ionic contamination (photo courtesy of Foresite)
PCB Cleaning Methods
PCB flux removal can either happen at the benchtop, which generally requires a manual cleaning method, or in automatic or semi-automatic processes.
Manual Flux Removal Methods
Manual methods are common for low volume assembly, rework, and repair, though they are more laborious and less repeatable.
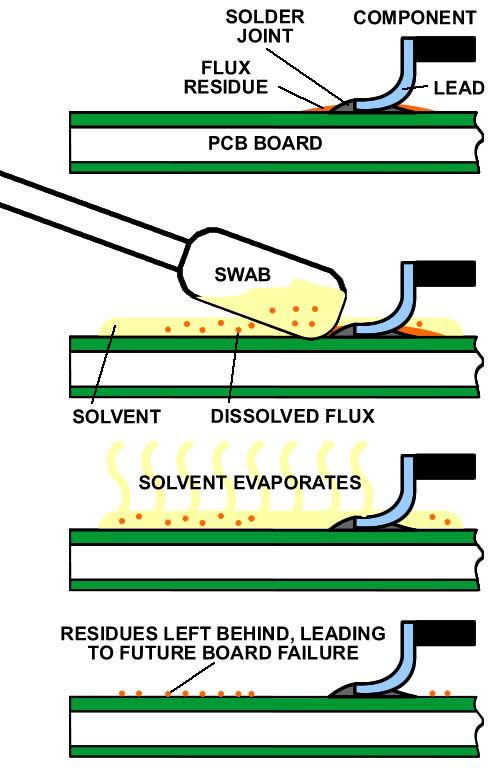
Flux residues don’t evaporate along with the solvent
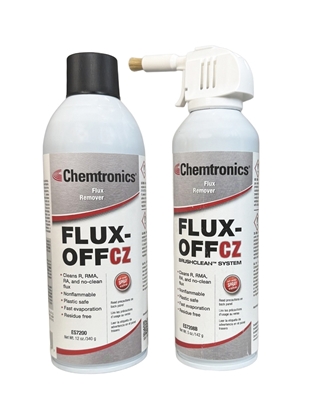
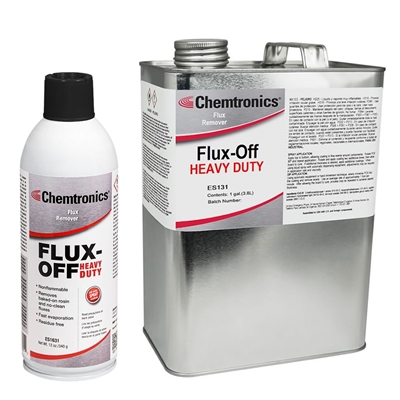
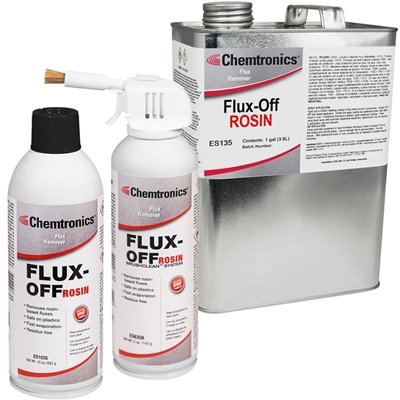
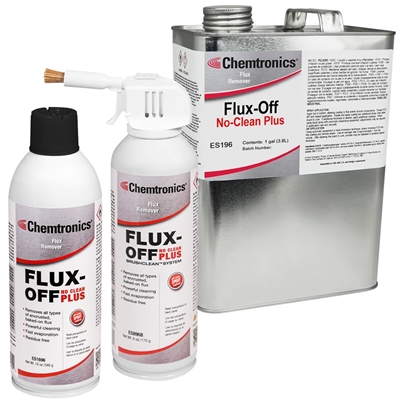
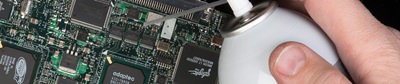
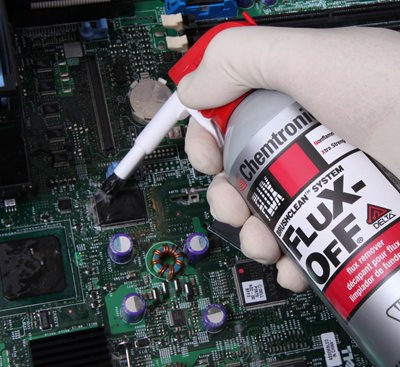
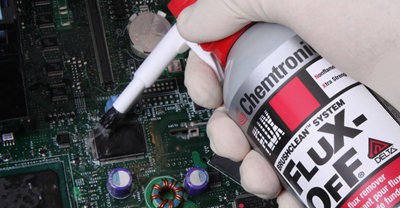
- Aerosol: Aerosol flux removers have the advantage of a sealed system (ensuring fresh solvent) and agitation (provided by the spray pressure and pattern). A straw attachment is generally included to spray into areas with greater precision.
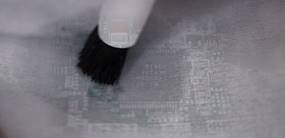
- Aerosol w/ brush attachments: A brush can be added to the aerosol nozzle, so the solvent sprays through the brush as you scrub.
- Trigger spray: Trigger spray bottles are more common for water-based cleaners and isopropyl alcohol (IPA), but not for aggressive solvent cleaners.
- Liquid immersion: The PCB can be immersed into a tray or bucket of solvent cleaner, with tools like swabs and brushes used as needed. Cleaning performance can be improved by heating the solvent, but this should only be done with nonflammable flux removers.
- Spot cleaning with a swab / Presaturated wipes: A cotton or foam swab can be saturated with a mild solvent like IPA from a pump dispenser, or you can use convenient presaturated wipes and swabs.
Aerosol with straw good for cleaning under components
Automated or Semi-Automated Flux Removal Method
For higher volume assembly or reduced variability, automated methods are used.
- Ultrasonic: Ultrasonic cleaning equipment uses sound waves to create implosions within the flux residue, breaking it apart and lifting it off the PCB. Most equipment have the option of heating the solvent (only use nonflammable removers). Change solvent regularly to prevent cross-contamination. Ultrasonic cleaning might be too rough on sensitive components like ceramic-based resistors.
- Vapor degreaser: The go-to process for the highest precision cleaning, as in aerospace and medical electronics. PCBs can be submerged in a sump of boiling solvent, in a rinse sump with ultrasonics, or rinsed in solvent vapors. Special azeotropic solvents must be used to prevent damage to any sensitive electronic circuits.
- Batch flux remover: Basically a dishwasher for electronic circuit boards where PCBs are stationary in a rack and water-based flux remover is sprayed over the assembly.
- Inline flux remover: An inline washer is like a carwash for circuit boards where PCBs travel on a conveyor through wash, rinse, and dry zones using water-based removers.
Aerosol brush attachment over a wiper dissolves and absorbs flux residues at the same time.
Best Practices for Manual Electronics Cleaning
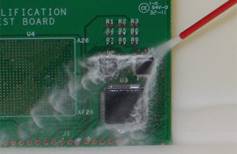
How to Use Aerosol Straw Attachments
The use of the straw attachment allows for a more controlled spray, thus eliminating excessive solvent waste. The straw is also useful in directing exactly where the solvent goes, allowing the user to guide the solvent under the component. Without the straw attachment, the solvent would be sprayed at the target area, but would be wasted and not reach beneath the component.

Visual comparison of an aerosol spray without (left) and with a straw attachment.
How to Clean Under Components
Best results are obtained when both the corners and sides of each contaminated component are addressed. Directing solvent directly into the corners helps to break up any flux dams located there. Because the corners were cleared first, this allows more channels for the solvent to pass through when the sides are addressed. The more open channels available, the higher likelihood that all flux trapped under the component will be able to flow out. For small components, use a stationary spray; for larger components, a cleaner board can be achieved when the spray oscillates back and forth to flow up and under the component from many angles.
Spray Angles
An exact straw angle of 30°, 45°, or 60° to the board has no differing impact on cleanliness; general downward or upward angles are sufficient. When trying to remove residues from under a component, spray close to the board at an angle that guides the solvent under the component. When all residues have been removed from underneath, spray from on top of the component, angling out along the edges to push any residues out and away.
Right and Wrong Ways to Use Brushes and Swabs
Handheld brushes and swabs can spread partially solvated flux around components which then dries, leaving a white residue. Polyurethane foam swabs become flimsy when saturated with aggressive solvents and tear easily. Brush attachments on aerosols provide a constant supply of virgin solvent, but still have the potential to introduce new contaminants or merely relocate residues if not rinsed. Without the force of an aerosol spray, the likelihood that residues beneath a component will be removed by scrubbing alone is slim.
Board cleaned with a handheld brush. The components were wetted, and then the brush was wetted and used to scrub the contaminated area. The board in the first picture did not undergo a final rinse. The board in the second picture did (not all flux was removed).
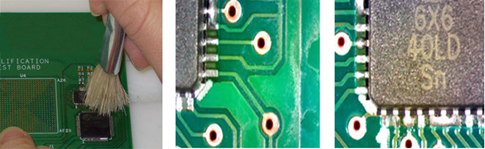
Brush attachment
Board cleaned with brush attachment (no separate aerosol was used). No pre-rinse or final rinse utilized. White residue shown around QFN and QFP, respectively.
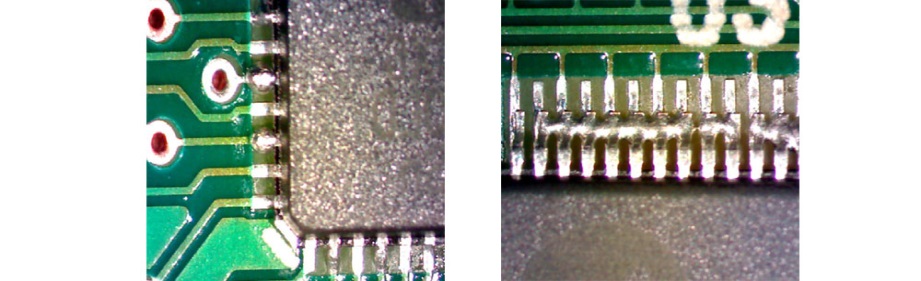
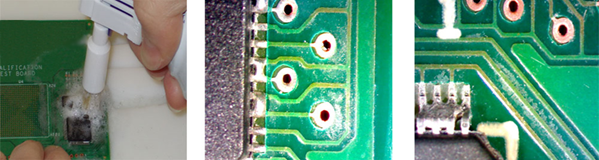
Board cleaned with brush attachment (separate aerosol was used for pre-rinse and final rinse). Some white residue shown around QFN B and QFP, respectively.
The Importance of a Final Rinse
The final rinse was found to be a necessary step. This step ensures that all of the solvated flux residues flow off the board completely and are not simply relocated. If higher reliability is required, greater care is needed to prevent latent failure of the final device from ionic contamination. The key is not to let the board dry out before rinsing; when the board dries, the partially solvated flux dries leaving behind white residue.
Troubleshooting Difficult Flux & White Residue
Any process engineer will tell you that the key to designing a repeatable process is to control the variables.
Variables That Increase Cleaning Difficulty:
- Flux Type: R, RA and RMA fluxes are generally easier to remove with standard flux removers and IPA. No-clean fluxes are intended to stay on the PCB, so they can be more difficult to remove and may require a more aggressive solvent, additional agitation, or heat.
- Higher Solids Flux: Tacky fluxes or other types with a high level of solids can be more challenging to clean, requiring more cleaning time, soak time, or additional agitation.
- Amount of Flux: A thicker layer of flux residue is more soil to remove and can create flux dams under low stand-off components.
- Soldering Temperature: Higher temperatures have a greater tendency to bake-on flux residues, making them more difficult to remove.
- Lead-Free Solder: Lead-free soldering generally requires higher soldering temperatures and more highly activated fluxes, which may require a more aggressive flux remover engineered for lead-free processes.
- Time Delays: As flux residues sit on the PCB, volatiles continue to flash off and it becomes more difficult to remove.
How to Remove White Residue
White residue is generally a symptom of ineffective PCB cleaning where the cleaner does not fully dissolve all constituents, or the solvent evaporates off and leaves behind unreacted activators, binders, or saponifiers.
To remove it:
- Spray the residue with a strong solvent.
- While the area is still wet, scrub with a clean tool like a wipe, swab, or brush.
- Spray the cleaned area and surrounding areas with the same solvent, angling the board so the rinse is able to run off.
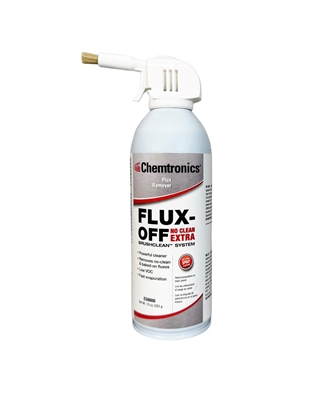
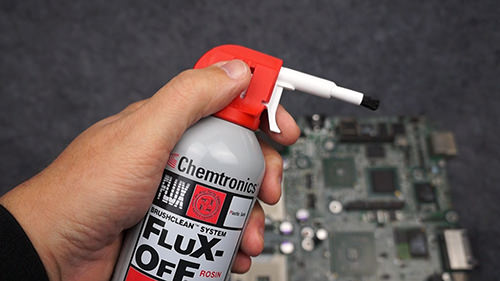
Flux-Off® Rosin with a brush attachment
The Most Popular Cleaner: Isopropyl Alcohol (IPA)
Chemicals are found throughout the electronic assembly and repair process, but no solvent is more common than isopropyl alcohol. Isopropyl alcohol (also referred to as IPA, isopropanol, 2-propanol, and rubbing alcohol) dissolves a wide range of polar and non-polar soils. It is often used to dissolve light oils, fingerprints, cutting fluids, flux residues, carbon deposits, and mold release. It is also readily miscible in water, so can be used as a drying agent.
You will find IPA being used to clean flux residues from recently soldered circuit boards, to remove solder paste from SMT stencils, and for maintenance cleaning to remove baked-on flux from reflow ovens and automated soldering processes.
Frequently Asked Questions (FAQs)
Q: How do you perform ionic contamination testing?
A: Poor quality control can be found by ionic contamination testing and analysis such as ROSE testing, Ion extraction, and chromatography. Initial high humidity validation testing at the beginning of the project can also identify potential issues. Strict quality control and standard operating procedures during assembly can go a long way in preventing a reliability nightmare.
Q: Does the flux type affect the effectiveness of the PCB cleaning process?
A: Yes, the type of flux can have a big impact on the cleaning process. R, RA and RMA fluxes are generally easier to remove with standard flux removers and isopropyl alcohol. No-clean fluxes can be more difficult to remove, and aqueous fluxes are generally designed to be removed in a batch or inline cleaning system. The short answer is to match the flux remover with the flux.
Q: Why does white residue appear days after soldering?
A: It is not unusual to finish the assembly on Friday, come back on Monday to clean and be surprised with white flux residues. As flux residues sit on the PCB, volatiles continue to flash off and it becomes more difficult to remove. If you are suddenly surprised by white residues, step back and look at your process to see if anything has changed.

White flux residue with visible copper corrosion (photo courtesy of Foresite)
Contact Chemtronics for more information on how we can improve your PCB cleaning operation: [email protected] or 770-424-4888.
Ask A Technical Question
Stay up-to-date on Chemtronics news, products, videos & more.
Related Products